Showing posts with label science. Show all posts

Wednesday, October 19, 2011

Rainbow Stew

Materials Needed:
1/3 cup sugar
1 cup corn starch
4 cups water
Food Coloring Red, yellow, blue

Instructions:
1. Mix together all of the ingredients in a sauce pan over medium heat.
2. Stir constantly until the mixture begins to thicken.
3. Remove from heat and let cool.
4. Divide the mixture into three bowls.
5. Add a different color of food coloring to each bowl.
6. Put approximately three tablespoon each of two colors into a zip-lock baggie.
7. Push out all the air in the bag and then seal the bag and tape the top closed.
8. I double bag sealing each baggie with clear packing tape.
9. Once the top is sealed go around the perimeter sealing all edges for durability
10. Let the children knead the baggies to mix colors.

**I like to only do TWO colors at a time or one color that way the baggies last longer you can still play with a purple baggie and it looks pretty but brown and black baggies are not so cute and that is what happens when you mix more than two colors.

Sensory Bags

One of my very favorite things to make are Sensory Bags well sensory bags and sensory bottles. These two items just scream preschool and fun to me. They are cheap to make create hours of entertainment, wonder, and exploration and are just plain awesome!

 So here we go how to make Sensory Bags: This is just one way to make sensory baggies.

You can check out my Rainbow Stew Baggies recipe by clicking on the link.  

Materials Needed:
Hair gel or thick shampoo (I prefer hair gel you can get it at the $1 Store by the tub) or get creative what else can you think of shaving cream, Aloe Vera, body lotion, Oil and water bag etc.
Food Coloring optional: Various themed goodies, sequins, glitter etc, i love adding those stretchy critters you can get see this post for what I am talking about.
Just make sure whatever you use is soft, flexible or has rounded corners so it does not puncture the bag.  

Directions:
1. Add hair gel to the baggie just a few tablespoons you don't want the baggie to full.
2. Add coloring and any optional themed enrichments i.e. sea creatures, glitter, confetti etc.
3. Seal baggie with tape
4. place inside another baggie
5. Seal this baggie on all edges with clear packing tape Space Baggie - Glitter, Hair Gel, Foam Starburst and Black Liquid Watercolor for color My favorite Baggie ever! Hair gel, packing peanuts and if you like some glitter. You can choose any theme and work with it. For healthy eating I used hair gel, glitter, and foam fruit pieces. This is not the prettiest baggie but you can add glitter and accessories to make it prettier. It is really cool though. I had some old sugar scrub from bath and body works that I stirred up and put in the baggie. It has a really cool consistency and it separates on its own so the kids have to squish it up to make it look like above. It is definitely a favorite. Ocean Theme using foam. Stock up on your foam pieces so that you can match any theme you are working on with a baggie. I USED ALOE VERA AND GOOGLEY EYES TO MAKE THE BAGGIE ABOVE Sensory Bags are easy to incorporate in your writing center as well as your science center. For these I attach the gallon size bags to a cheap plastic cutting board (these were 2 for $1 at the dollar store). That way they can be reused easily without any further setup. Have the children practice their Letters, numbers, etc by using their fingers to create symbols on the baggies when done just press flat and start again.

*If your baggie has some writing on it from the manufacturer like the pic above use some acetone ( nail polish remover) on a cotton ball just rub over the writing and it should come right off*

How to make Smell Jars

Smell Jars


Ingredients:
empty containers such as pill bottles (I have a ton of these stashed under the sink by the bathrooms)
cotton balls
a hammer and a nail
extracts and spices

Directions:
1. You will need different extracts in a variety of scents. I have a ton so just ask and I will bring them.

2. Put the cotton ball in the plastic container. (NOTE: If you do not have cotton balls, you can also use small pieces of paper towels.)

3. Saturate the wet cotton ball (or paper towel) with a spice, extract, or scented oil.

4. Seal the pill bottle or container with lid.

5. Take the hammer and nail and punch a hole in the top pull out the nail and your done.

6. Introduce to children and enjoy! This is a fun way to teach children about their nose and sense of smell.

** You can use simple extracts like vanilla, raspberry, strawberry etc.
*** you can use essential oils like tea tree oil, lavender etc.
**** you can use spices like cinnamon, cumin, basil etc


How to make Sound Jars

Use Pill bottles or other securely sealed small container and add material ingredients that will make different sounds use only one material in each bottle such as:

Beans
popcorn kernels
rice
beads
gravel
sand
flour
water
Any other ideas?

Add these ingredients singularly (each bottle only has one ingredient)in bottles I make two of each so that the kids can match the sounds. Let the children shake and listen to the bottles and then match up the sounds in the bottles.

How to make Feelie Gloves

Feelie Gloves-

Materials Needed:

Latex gloves
rice
cotton balls
beans
buttons
flour
water
air
beads
salt
sand
Anything else you can think of


Directions
Fill latex gloves with the different materials listed above or anything else you can think of tie a knot in the end to close. Then let the kids feel the gloves and explore the different textures.

How to make Science/ Discovery Bottles


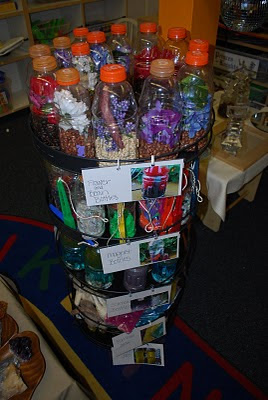
For my Post on how to make LOTS and I mean LOTS of amazing Discovery Bottles visit this link I have WONDERFUL TIPS AND IDEAS plus tons of pics on my site Familylicious

Dino Eggs or Geodes

Dino Eggs or Geodes

Materials Needed:
Coffee grounds – Go to Starbucks ask for Donation
1 cup of used coffee grounds
1/2 cup or so water
1 cup of flour
1/2 cup of salt
wax or parchment paper
mixing bowl
small objects to put inside the dough like small dinos or stones


Directions:

Stir the together the coffee grounds, water, flour, and salt until well mixed.
Add water as needed. It should be like a thick dough.
Knead the dough together and then roll into a ball insert a small dinosaur or plastic gem etc in middle roll back into a ball (or Dinosaur egg)
Put onto the waxed paper or aluminum foil.
Bake at 275 degrees for about an hour.
Check to make sure they are hard and then remove.
Make sure to flip them over once taken out the bottom is always a bit wet still so once out if you flip it the “egg” will dry out overnight.

**Triple or quadruple this recipe to make enough for the school**


Thursday, October 6, 2011

Making a Light Box

Here are the Materials Needed:
I used a light strand instead use a 18 inch florescent light fixture it gives off much less heat
drill
duct tape
and plastic tote

For this project Iwas making the light box for an Imaginary Play station Vet set up so I added a clothespin and hanging element.

Make sure you use a light strand that does not give off a lot of heat I also drilled holes in the side for air flow.

For the museum I will be using the light box as well but laying it on down and adding color paddles etc.